
Claude Code from Zero to One: Four Stages, Explained
Contents
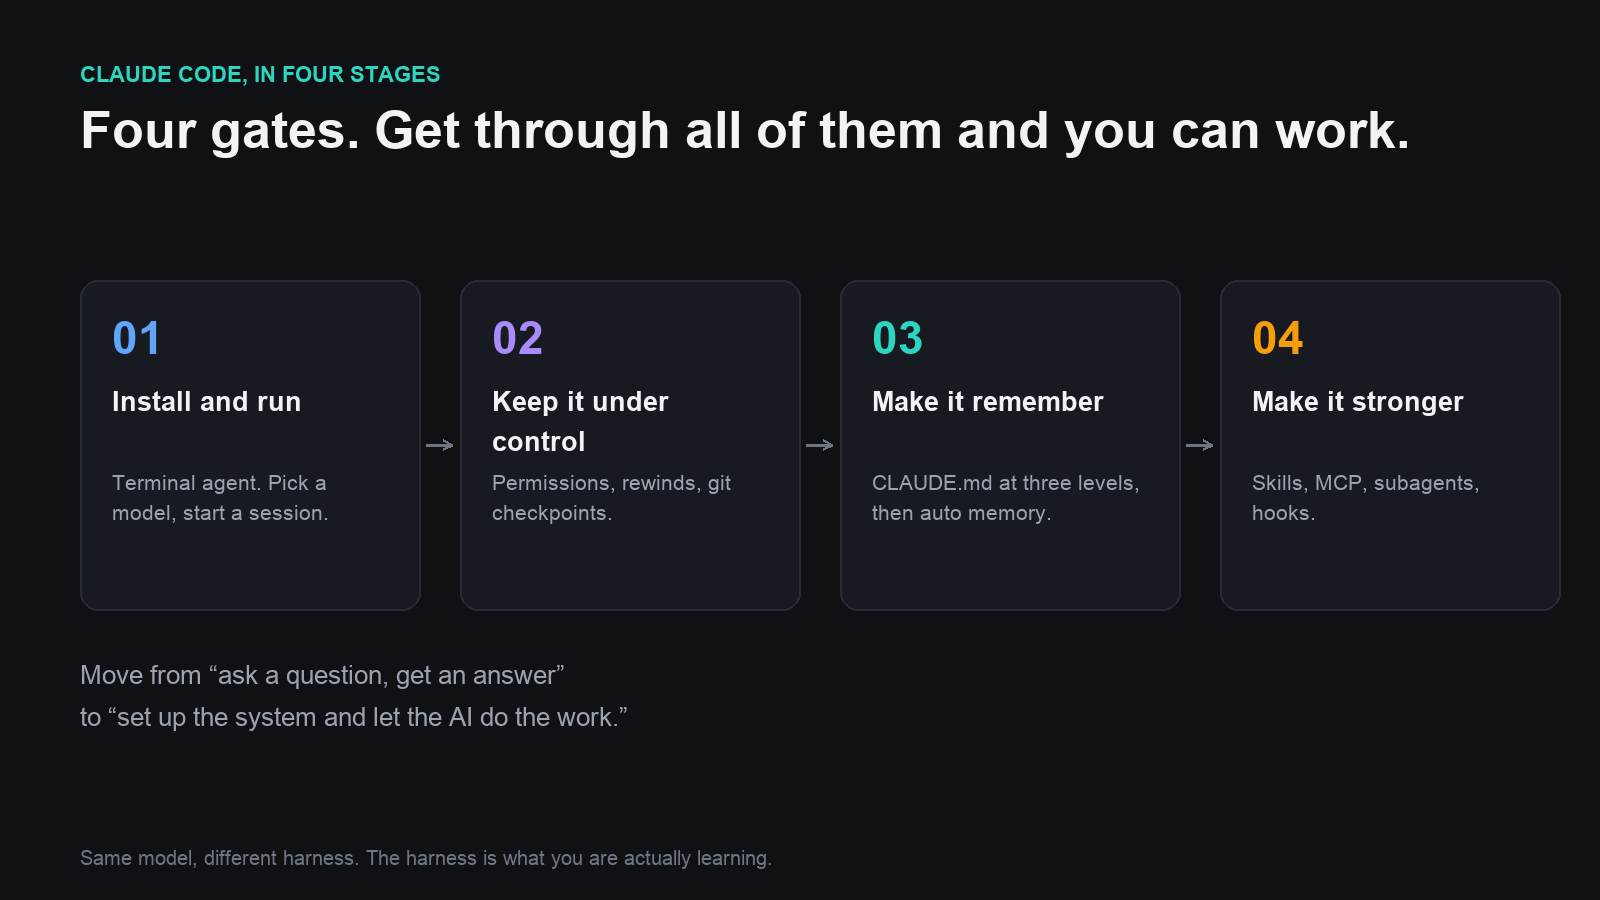
Get it running, keep it under control, help it remember, then make it more capable.
View full-size illustration
Stage One: Install It and Get It Writing
Claude Code is Anthropic's terminal agent, introduced in February 2025. What separates it from a chat AI is the model-and-tool loop: you give it a prompt; the program sends that prompt and the available tool descriptions to a model; the model chooses a tool; the program runs it and returns the result. Around it goes, until it considers the task finished.
Two things make it useful for work that a browser chat can't do on its own. First, it runs on your computer and can read files, edit them and run commands within its permissions. Second, its harness is well developed. A harness is everything around the model that helps an agent work better. Using the same compatible model through Claude Code or Codex means changing the harness around it.
Installation can be a single command from the official site, or a job for the agent in your IDE. The terminal gives you a broad set of controls. Pair it with an IDE such as Cursor: files on the left, code in the middle, and terminals below for talking to the agent.
Next, configure the model. An agent's “brain” can change within the models and providers it supports. Use /login for a supported subscription login; for API access, configure the appropriate key and endpoint through a supported setup before starting.
For a first conversation, try “Build a Pomodoro timer.” When important context is missing, Claude can ask which technology stack you want and work through a plan before implementing it.
Use Shift+Tab to cycle through the available permission modes. Three to understand first are:
- Plan: Work out the plan before you approve implementation.
- Default: Ask for approval where the permission rules require it.
- Auto-accept edits: Allow file edits without individual approval; command approval still depends on the applicable rules and sandbox.
There's also a mode you enable at startup that skips permission prompts. Start with the default if you're new.
When reviewing a plan, you can accept and allow edits, accept while retaining approval control, keep discussing it, or send feedback for another version. Installing dependencies is a terminal action, so accepting file edits doesn't by itself approve that installation.
While Claude is running in your terminal, ordinary input goes to the conversation. To run a shell command, open another terminal or prefix the command with ! for Bash mode. In supported terminals, Ctrl+B can move a running task into the background so you can keep talking.
There are three useful ways to give it context: @ a file, so it doesn't have to hunt through the project for it; add an image through the terminal's supported input; or put a long prompt in a file and @ that. Multiline entry depends on the terminal: Option+Return works in supported Mac setups, while other terminals have their own shortcuts or configuration.
A small surprise: shorter instructions can cost more tokens. If you leave out the context, the agent may have to read a lot of files to work out what you mean.
Remember three commands: /model to change models; /btw for a side question without adding that exchange to the main conversation context; and /simplify, a built-in skill that reviews changed code for reuse, quality and efficiency, then addresses what it finds.
Stage Two: Keep It Under Control
What if it breaks something? Press Esc twice, or use /rewind, to restore the conversation, file edits, or both. The catch is that this covers edits Claude tracks. It doesn't undo the effects of shell commands, such as installing packages or downloading files.
Git is the better save system. Commit after a useful step, as if you were making a checkpoint in a game. You can ask Claude Code to install Git, connect the project to GitHub, commit changes or help restore an earlier version. AI-generated code is unpredictable; version control gives you room to let it try.
A long conversation can get less useful because its context window is filling up. Every message, file it reads and tool result takes space. Even an advertised window in the millions of tokens isn't a promise that every detail will get equal attention all the way to the limit.
/compactsummarizes the conversation while keeping the essentials. A task boundary can be a good time to compact and refocus./clearclears the conversation context./contextshows how the window is being used, including tool and skill overhead.- Put context usage in the status line if you want to keep an eye on the percentage.
- Use
/resumeto choose an earlier conversation, or start with-cto continue the most recent one.
Around 60% is one possible checkpoint for considering compaction, rather than a universal cutoff you have to obey.
Stage Three: Help It Remember You
CLAUDE.md supplies instructions across conversations. Think in three layers: user-level preferences, such as the language you want replies in; project-level details, such as the stack, folder layout and team conventions; and subdirectory instructions for a particular part of the work. These can build on one another, but conflicts are possible, and they don't outrank system or organization policies.
Use /init to draft the project file from the codebase. It's more useful once there's a project to examine than when you're staring at an empty folder. For your personal instructions, ask Claude to put a preference in your user-level CLAUDE.md, or open /memory to manage the relevant files.
What belongs there? Keep it lean: the principles that rarely change, followed by the recurring mistakes worth preventing. A useful shared rules file earns its place by stating those principles clearly, rather than trying to describe everything.
Auto memory is the second layer. It's on by default in local sessions, with exceptions for some self-hosted and background environments; manage it through /memory. It can save preferences, corrections, project decisions and useful resource references. Memory is scoped to the repository. The start of its MEMORY.md index is loaded into context, up to 200 lines or 25KB, whichever comes first; detailed topic files can be read when needed. That index does use context. If it remembers something wrong, ask it to forget or correct it.
The third layer is documentation you write yourself: visual-brand rules, a copy style guide, and an instruction in CLAUDE.md to read the right document before doing that work. Persistent memory comes down to supplying distilled context at the right moment. Put bluntly, it's still prompting.
Stage Four: Make It More Capable
Skills are subject-specific instructions for the AI. They can supply knowledge, such as page-design rules; a process, such as expense reimbursement; a tool workflow, such as calling an image model; or a mixture. You don't put all of that in CLAUDE.md, because it isn't needed all the time. Skill metadata, including the name and when to use it, helps the model decide when to load the rest.
Installing a skill means putting its folder in a supported location, at user or project level. The agent can select one, or you can invoke it yourself or name it in the prompt. Too many competing skills, crowded context or vague trigger descriptions can make selection less reliable. Use a skill-finding tool to discover them, or Anthropic's skill creator to build your own.
MCP connects the agent to external tools such as Notion and Figma. Tool descriptions and results can consume context, though the cost depends on how tools are discovered and loaded. Use skills for reusable instructions and consider a CLI where command-line access suits the job: it gives the agent a precise way to call functions that people would otherwise click through.
Subagents can be useful for research. A main agent that stops coding to investigate everything itself also fills its context with the investigation. A subagent gets a separate context and can return the findings; several can work in parallel, using their own share of the allowance. The agent can delegate when appropriate, and you can create or manage subagents with /agents.
A hook is a response to a defined event: play a sound when a task finishes, or run formatting before a commit. A plugin packages skills, subagents, hooks and MCP connections together. Manage plugins with /plugin.
One Last Thing
Through those four stages, you've got enough to get going. The habit worth building is to move from “ask a question, get an answer” to “set up the system and let the AI do the work.” Once that feels normal, the next new tool is much easier to pick up.