
A Full Map of the Codex Desktop App: From Installation to Letting It Operate Your Computer

Contents
Codex comes in several forms. The desktop app brings permissions, memory, plugins, parallel work and cloud tasks into one interface. Here's how the main pieces fit together, from setup to getting work done.
Before You Install
Download the installer for your operating system from the official site. Git is useful for version control; Node.js and VS Code are useful when the work calls for them, rather than requirements for everyone who opens the app. Windows and Mac availability doesn't mean every feature is identical, particularly computer use.
On first launch, sign in with your ChatGPT account; access and allowances depend on your plan. Choose your main use during onboarding, review any suggested plugins and skills, and complete the workspace or sandbox setup offered by your installation.
The Interface: See Who's Stuck
The desktop layout puts projects and chats alongside the conversation and a panel for the work you're viewing. Choose a folder for a project, open a new chat, and you can have several tasks running in parallel.
Learn to distinguish three things in the task list: work in progress, a request waiting for your approval, and a task whose run has finished. An unread update isn't necessarily a finished task. Knowing the status can tell you where to look faster than digging through logs.
Use sidebar search to find a conversation; its search scope determines whether it can match a title or text inside the chat. You can rename chats, and archiving lets you put them away without losing the option to restore them.
Permissions: The Sandbox Is the Foundation
Codex can work within an allowed workspace, reading and editing permitted files and running local commands without asking about every step. File and network boundaries depend on its configuration. They're enforced by the execution environment, not just by asking the model to behave; on macOS, sandboxing can use Seatbelt.
Actions beyond those boundaries may need approval. The familiar choices are asking you, sending eligible requests to auto-review, or granting full access. Auto-review can spare you routine approval decisions while keeping the workspace boundary in place. Full access removes that usual sandbox restriction, rather than overriding every operating-system or service control.
There's a reason people call this a harness. The AI is the horse; the sandbox and approval system are the gear that helps you keep it under control.
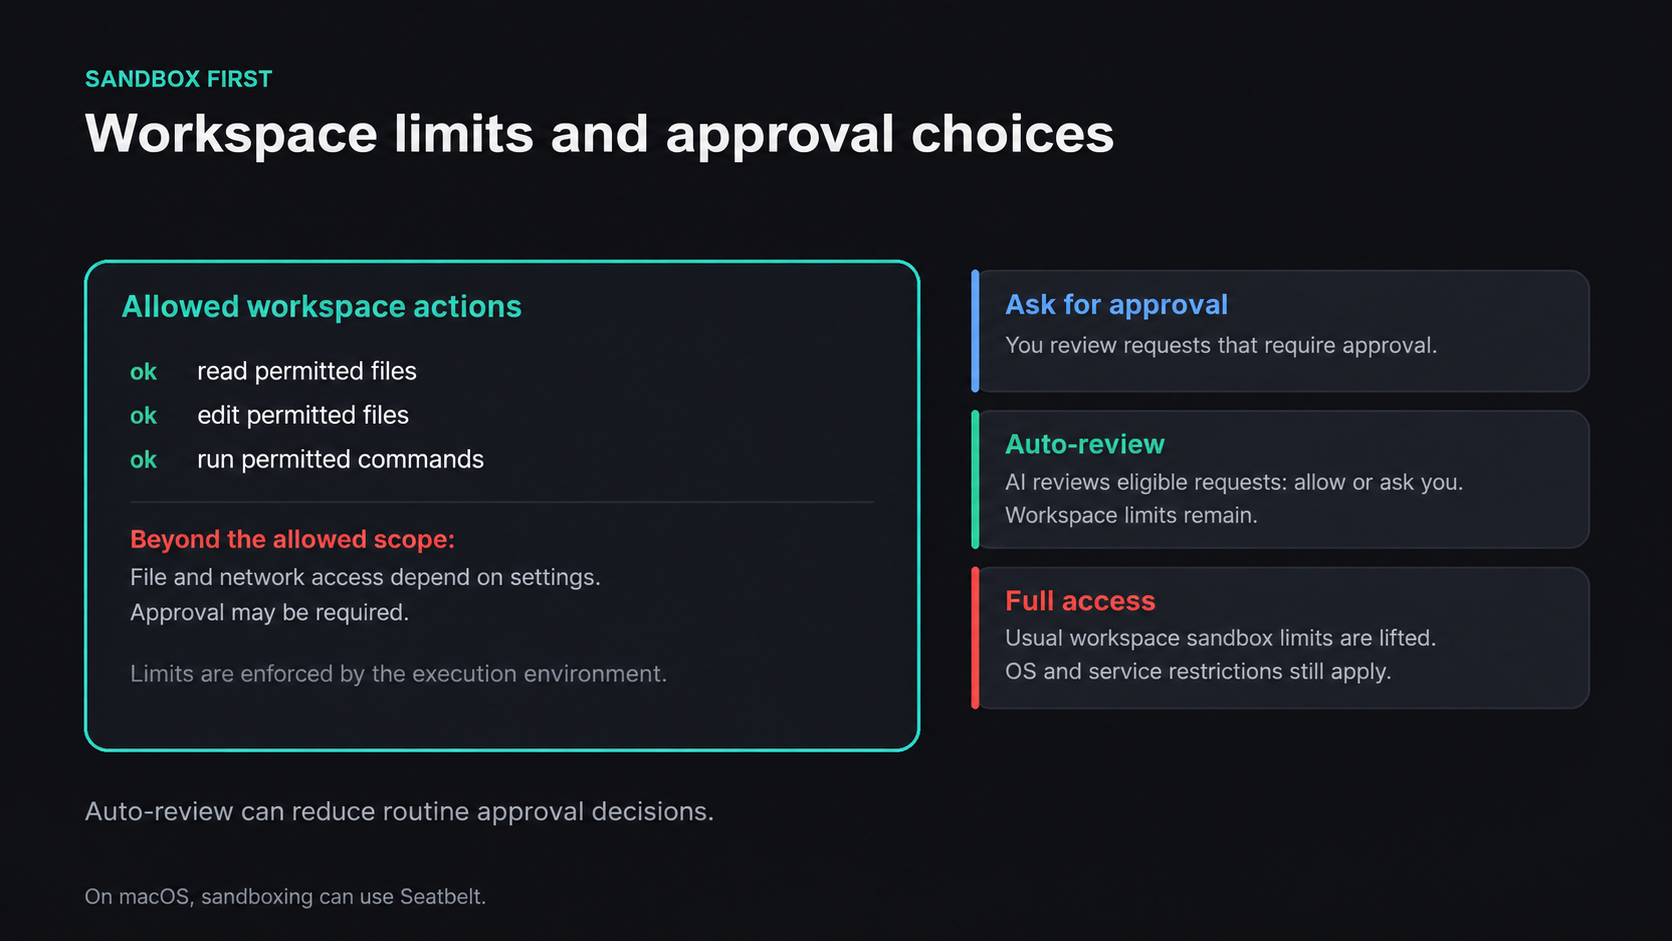
Workspace limits and approval choices govern different parts of the work.
View full-size illustration
Context and Usage Limits
The context indicator shows how much of the conversation window is in use. Long conversations can be compacted automatically, and you can also request compaction. For a finished task, though, a fresh chat can be better than compressing the old one: yesterday's details can keep competing for attention.
The model and reasoning controls sit alongside speed choices where they're available. Faster modes can trade higher usage for shorter waits; the rate depends on the model and whether you're using a subscription allowance or purchased credits. Check the usage display for the limits that apply to your plan. Voice dictation is another way to fill the prompt box.
Plan Mode
The composer offers ways to add files, use connected plugins and switch into plan mode.
In Codex plan mode, the agent works out a plan before making changes. It can ask you to settle details: App Router or Pages Router? Move the styling to Tailwind? Start a local server afterward? Once the plan is agreed, ask it to implement it; with browser tools available, it can then open a preview and inspect the result.
Not happy with something? Annotate the relevant element: “Why is this star an outline?” The agent gets a specific thing to change, right where you spotted it.
Code and Rolling Back
A desktop code view isn't the same as a full IDE. Editing and annotation options depend on the interface and file type; VS Code can still handle the direct editing. Use the app's editor action to open the project there.
Before changing code, initialize Git, have the agent write a suitable .gitignore, and push the project to GitHub when you're ready. Two useful next steps:
- Rolling back: Fork a chat from an earlier point to branch the conversation, then use Git separately to restore the appropriate code state, preserving any uncommitted work first. A fork doesn't roll back files, and neither step undoes actions already taken outside the repository.
- Worktrees: Give branches their own working directories within the same Git repository. That lets two tasks edit separate copies rather than overwrite the same files. Merge the changes back afterward, resolving any conflicts.
Cloud Work and Memory
With the project on GitHub and the cloud connection set up, you can send a task to Codex in the cloud, review the resulting pull request, merge it, and sync the changes locally. Being able to review from your phone is useful when you've left your computer behind.
For lasting instructions, use AGENTS.md. A file in the project guides work in that project; personalization settings can supply guidance across projects on the selected machine. Add something useful, such as “I'm comfortable with Python but lost when it comes to CSS. Explain it in plain English,” or ask the agent to read the codebase and draft the project instructions.
One rule worth adding to the global instructions is: Don't delete files in bulk. Delete them individually; if a batch deletion is needed, stop and ask me. That gives the agent a clear instruction for jobs such as clearing test files. It's guidance, though, rather than a permission lock that makes bulk deletion impossible.
Plugins, Skills and MCP
Connect GitHub and Gmail, and you can combine them in one request: “Summarize the first ten projects I've starred and email me the summary.” With the accounts connected and sending explicitly authorized, the agent can carry out that workflow. Ask to make it an automation for Fridays at 4 p.m. Saving what it learns as a memory is a separate capability, not an automatic consequence of installing a plugin.
Skills have three practical routes: use a supplied skill, such as one for making a 3D conical-pendulum animation with Remotion; install a third-party skill, such as a PowerPoint workflow, in the location your client supports; or build your own. The skill creator can turn “add subtitles to a video, then make an illustrated Markdown article” into a reusable process, including ffmpeg screenshots at the specified points.
Add MCP servers in settings. With Supabase, for example, configure the server URL, use codex mcp login supabase when that is the configured server name, complete authorization, and reconnect or restart if required. With the connection available, a task can cover creating a table, writing through a backend connection pool, and updating the frontend form.
A connected Netlify plugin can provide the deployment step: ask it to publish the project and return a public URL.
Computer Use
On a supported Mac setup, invoke computer use with @ and ask it to open a messaging app and send your manager a note, with confirmation before sending. It operates through a computer-control surface; whether it runs in the background without affecting your windows depends on that surface. You can also ask it to open a GitHub board, summarize ticket progress in an English briefing, and send it with your authorization, then turn that workflow into a daily 5 p.m. automation. On a Mac, the setting to prevent sleep while running can help keep a long task going.